Month: April 2017
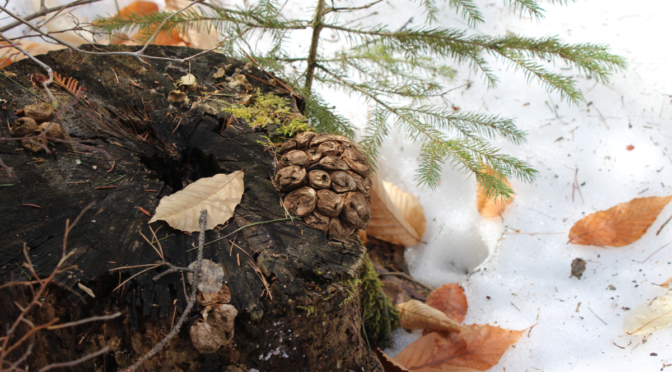
Birthday party and the last of the snow
Spring Flowers, New Camera
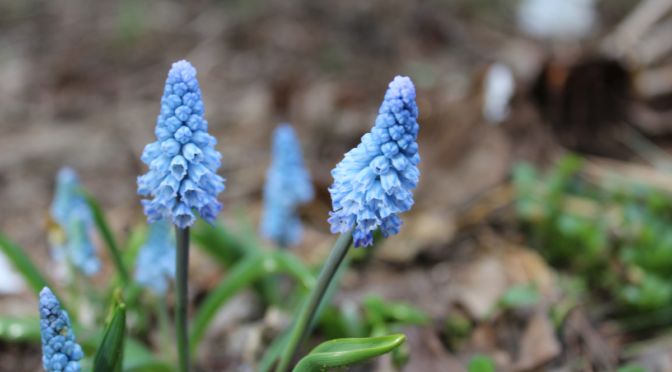
Got a new camera and took advantage of the Spring flowers popping up.
Also trying out a different publishing workflow, let’s see how it goes.
[PiwigoPress id=19633 url=’http://gallery.webmadman.net/’ size=’me’ desc=1 class=’img-shadow’ lnktype=’album’ opntype=’_blank’ order=’undefined’]
[PiwigoPress id=19635 url=’http://gallery.webmadman.net/’ size=’me’ desc=1 class=’img-shadow’ lnktype=’album’ opntype=’_blank’ order=’undefined’]
[PiwigoPress id=19649 url=’http://gallery.webmadman.net/’ size=’me’ desc=1 class=’img-shadow’ lnktype=’album’ opntype=’_blank’ order=’undefined’]
[PiwigoPress id=19632 url=’http://gallery.webmadman.net/’ size=’me’ desc=1 class=’img-shadow’ lnktype=’album’ opntype=’_blank’ order=’undefined’]
[PiwigoPress id=19644 url=’http://gallery.webmadman.net/’ size=’me’ desc=1 class=’img-shadow’ lnktype=’album’ opntype=’_blank’ order=’undefined’]
[PiwigoPress id=19636 url=’http://gallery.webmadman.net/’ size=’me’ desc=1 class=’img-shadow’ lnktype=’album’ opntype=’_blank’ order=’undefined’]
[PiwigoPress id=19648 url=’http://gallery.webmadman.net/’ size=’me’ desc=1 class=’img-shadow’ lnktype=’album’ opntype=’_blank’ order=’undefined’]
Photogrammetry Workflow
Touch/click-hold and drag to rotate my head, scroll/unpinch to
zoom. The gear in the corner has other options.
This is the result of a new workflow I just managed to get working, I’m quite excited about it and would like to share the process.
I’ve been experimenting with photogrammetry for a while now. It’s a process of extracting 3d information from a series of 2d pictures. And in conjunction with that, I’ve been working with Blend4Web- a way of putting 3d work onto the web.
Check out some older work of mine with Blend4Web-
https://webmadman.neocities.org/index.html
I recently upgraded my OS from Ubuntu 14.04 to 16.04 and was having a very frustrating time getting my photogrammetry workflow re-established. I was very fortunate to come across this post-
http://blog.mardy.it/2017/03/making-snap-packages-of-photogrammetry.html
A light at the end of the tunnel!
With the incredibly easy to use Snaps, I was able to try out a few approaches, the one I have been getting the best results from is the Multi-View-Environment (mve).
The video tutorial is pretty brisk, so I thought I’d post a blog with the process typed out, making it easier for others wanting to explore.
I’m running a 64bit version of Ubuntu 16.04, not sure how this will work on anything else.
First install Snap.
sudo apt-get install snapd
Look for mve-
snap find mve
I get this coming up-
Name       Version     Developer  Notes  Summary

mve        20170210-1  mardy      -      Multi-View Environment

mve-mardy  20170204-1  mardy      -      Multi-View Environment
Seeing mve as the most recent version, I installed it. I don’t have a login for Snap, so I ran the snap install as sudo-
sudo snap install mve
Once installed, I was able to step through the process as follows-
Open a terminal in a folder containing only the images to be used and run each of the following commands- be forewarned, some of these operations can take a really long time, depending on the complexity of the scene and the power of your machine.
mkdir mve

cd mve

mve.makescene -i .. scene

mve.sfmrecon scene/

mve.dmrecon -s2 scene/

mve.scene2pset -F2 scene/ scene/pset-L2.ply

mve.fssrecon scene/pset-L2.ply scene/surface-L2.ply

mve.meshclean -t10 scene/surface-L2.ply scene/surface-L2-clean.ply

mvs-texturing-mardy.texrecon scene::undistorted scene/surface-L2-clean.ply textured
After all that, you will have a folder, “mve” in your images folder. Inside that is a file “textured.obj”, along with it’s asset files (as well as a few other files generated in the construction process), there’s also a folder called “scene” that has a series of .ply files- these can each be opened in Meshlab. By opening them in Meshlab you can have a look at the progress each step makes.
The next step in getting the object online is using Blender and Blend4web.
https://www.blend4web.com/en/downloads/
For what I did here, all you need is the plugin. If you get the full SDK, I found the version of Blender you download from the Blender site and run in it’s own folder works better than the version I installed through my repositories- I think there’s some Python things that are different.
Once you have Blender started with the Blend4Web plugin, change the renderer from Blender Render to Blend4Web. Delete the default cube.
Under File> Import> Wavefront (.obj), find the texture.obj created earlier open it.
The object will probably be upside down, backwards and way off center, gotta fix that.
Select the object (I won’t get too deep on using Blender, there are a lot of tutorials to get you rolling), tab into edit mode, all verts should be selected, move and rotate the object to it’s correct orientation.
Tab out of edit mode. With the object still selected go to the material tab of the property panel. Under shading, set Emit to 1. Scroll to the Rendering Options section and unclick Backface Culling.
Save the blend file.
Then, under File> Export> Blend4Web (.html), save the ready-for-the-browser file.
You can download the html file as well as the source video and images used for the head above here-
http://sketchbin.webmadman.net/b4w/webmadman1/
Hope that can help someone.
