First, I’m going to do a quick run through on my workflow, then I’ll go in to some details on how I got there and issues you may encounter.
My OS setup is using Ubuntu Studio (https://ubuntustudio.org ) as my base. This sets me up with the low latency kernel, which is best for recording and real time audio work.
From there I add the repositories from KXStudio (http://kxstudio.linuxaudio.org ). From this I install Hydrogen with extra drumkits, the mda-lv2 plugins, Ardour, and a whole bunch of other stuff. I started with the Qtractor and QMidiArp from KXStudio, but as I mention further on in this post, I’ve been compiling from the newest source lately to get ahead of some bugs- more on that later, first the workflow…
Here’s a video of the workflow-
The project created in the video- http://sketchbin.webmadman.net/2017/2018_01_05.7.qtz
When I start up Qtractor, the first thing I do is go into File > Properties, set up a new directory for my new project and give it a name. Often I’ll use the date in YEAR-MN-DY format as the directory as well as the Session Name.
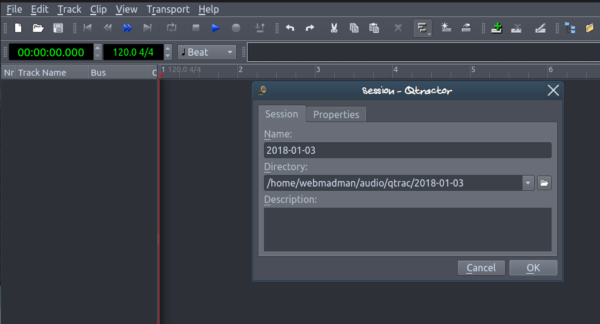
And then saving the project. Qtractor saves backups regularly, you can set the interval in View > Options in the General tab. Frequently saving your work can save a lot of lost time- something I’ve learned from too many tragic experiences.
I then add a new track- Track > Add Track…
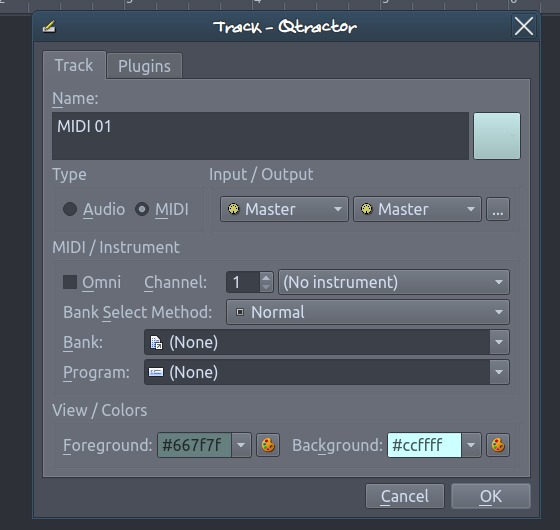
Give it a name and select the type as MIDI, then move to the Plugins tab. For my initial instrument I often use the MDA Piano or ePiano – the first track will be chords and I find these plugins to be clear and legible when playing chords.
I then right click to add an Aux Send insert-
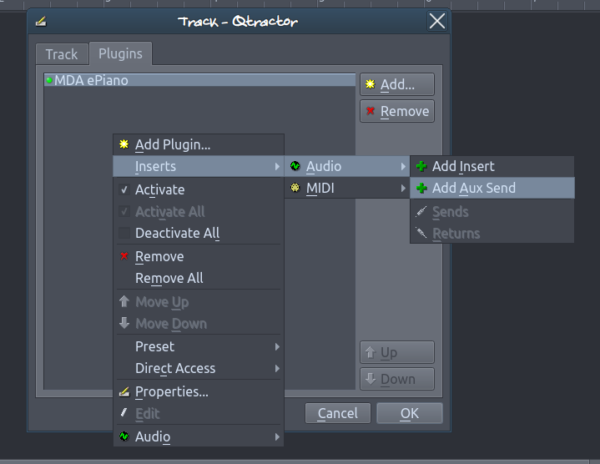
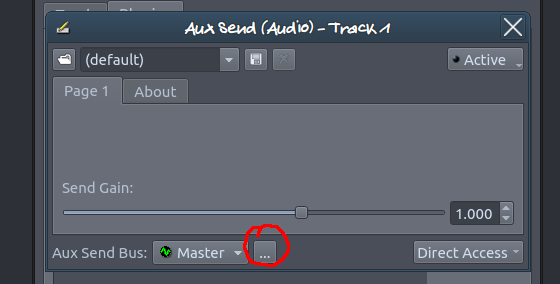
In the dialogue for adding the Aux Send, click on the “…” to add a new bus.
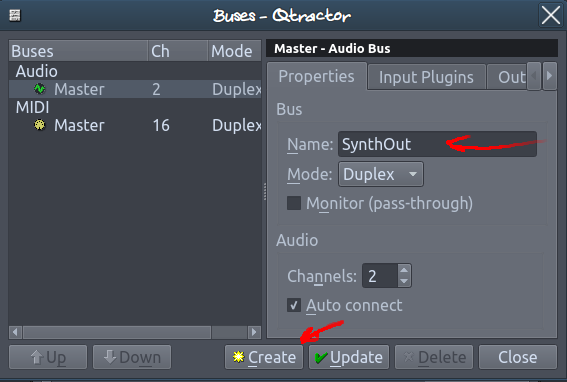
To add an audio bus, select the Master Audio Bus and change the name (I usually use SynthOut) and the Create button will activate.
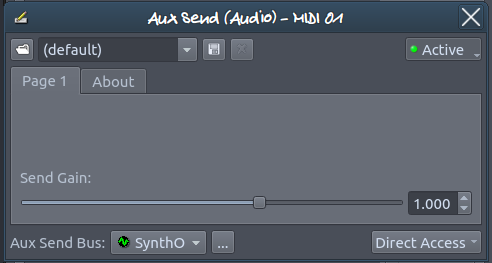
After hitting Create, be sure to switch the Audio Send Bus to the new bus you just created. As well as clicking the Active button so that the light is green. Use the “x” to close the Aux Send dialogue.
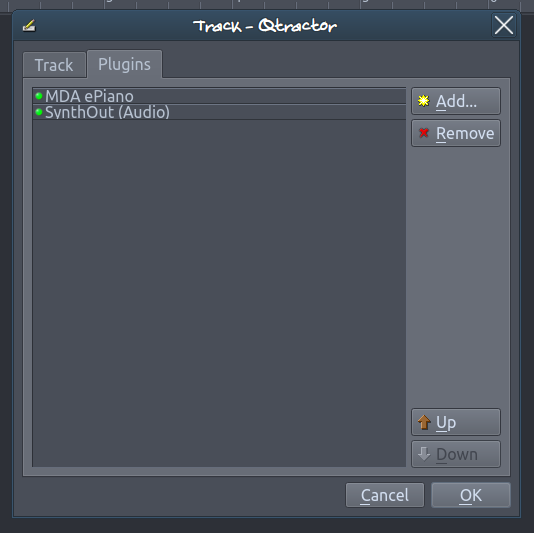
And the initial track is good to go, click OK.
This first track will be a series of chords. The core of this approach is about exploring chord progressions, so this is where the initial foundation of the project is laid out.
I create a new clip- Clip > New…
If you haven’t set the directory and name of the project and saved it, it will prompt you to do so now. Qtractor automatically creates a new midi file in the project directory. I tend to hit the Save icon fairly regularly when I’m editing.
This is where it gets creative, what progression and structure to use is wide open. Qtractor allows you to snap to a scale/key (View > Scale), which can be helpful. There are numerous websites that have charts and tables, look up what chords are in some of your favourite songs, or there’s apps you can use.
A basic pattern I’ve been following over the last few years is to use an 8 bar pattern where the first 4 bars and the last 4 bars have a particular flow.
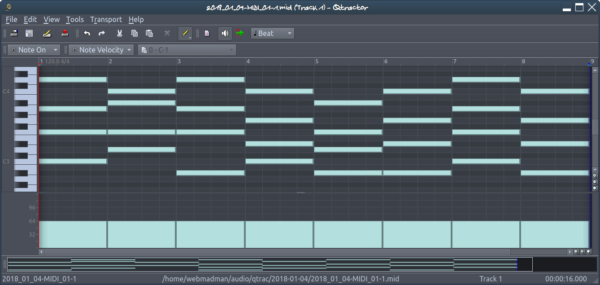
I then sequence them so that the first 4 bars plays 3 times followed by the last 4 bars once.
![]()
It’s a starting point to then create variations off of.
I then set up the loop region- grab the little blue triangle at the start of the timeline-

Drag it to the end of the sequence, let it go, then click and drag it to the beginning, then enable looping-

At this point you can listen and edit until you get a flow your pleased with.
Now bring up the mixer-
![]()
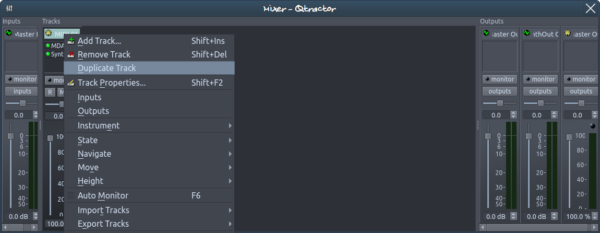
Right click on the top of the track and select Duplicate Track.
Right click in the plugin area of the new track and Add Plugin-
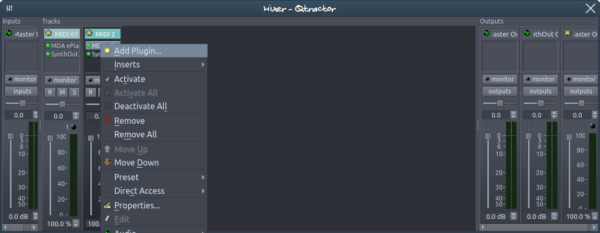
Add the QMidiArp plugin. By default, Qtractor brings up the QMidiArp gui. You can jump right in and add some patterns as I outlined in this blog post-
https://blog.webmadman.net/2017/10/10/qmidiarp-patterns-by-webmadman/
You can also grab a bunch of presets I’ve made here-
http://sketchbin.webmadman.net/qmidiarplv2presets.tar.gz
These can be uncompressed into the .lv2 folder of your home directory or you can set a different folder in the options- View > Options…
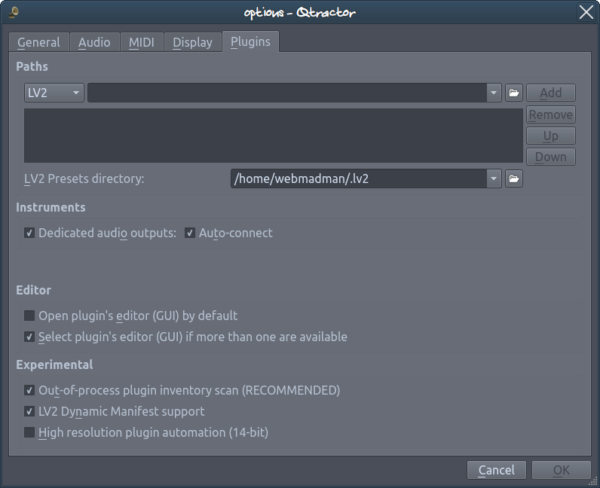
Note that I have the “Open plugin’s editor (GUI) by default” unchecked, this brings up the plugin Properties instead of the editor when I first add a new plugin-
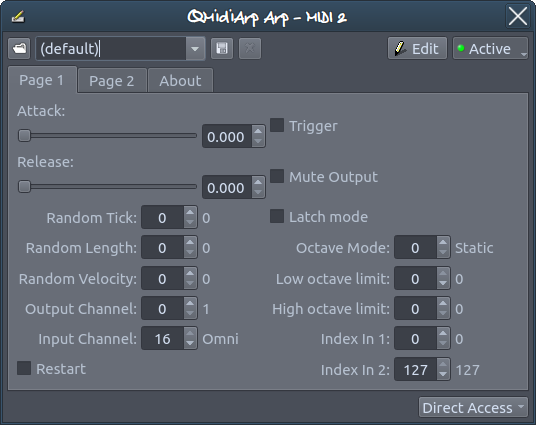
This lets me choose a preset-
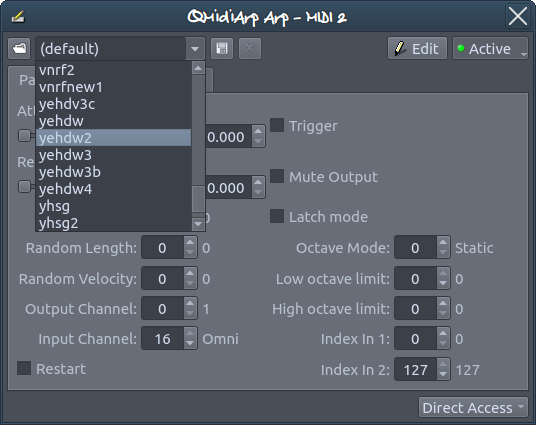
From there I can open the QMA GUI using the Edit button-
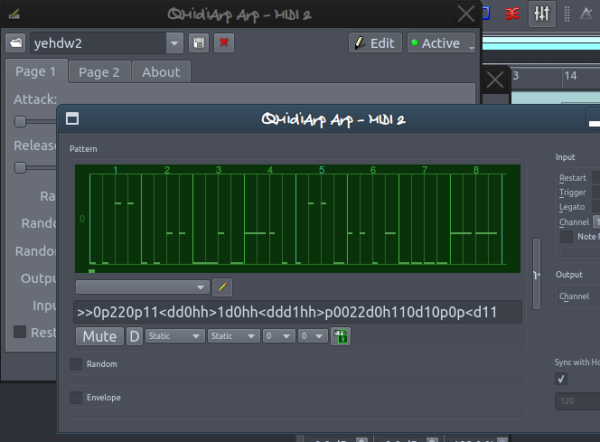
Close out the editor and properties. The order of the plugins needs to set now. Move QMidiArp from the bottom to the top-


I then remove the piano and replace it with a new instrument-

In this case, the MDA DX10.
From here, I continue adding and tweaking tracks until I have a number of parts to bring in and out.
Somewhere along the line I add some drums. I develop my beats in Hydrogen (http://hydrogen-music.org/hcms/ ). I have a bunch of my Hydrogen files here- http://sketchbin.webmadman.net/hydrogen/
The “layers” folder has ogg and wav files of loops ready to go.
To import, go to Track > Import Tracks > Audio…

Then select all the drum clips and copy them-
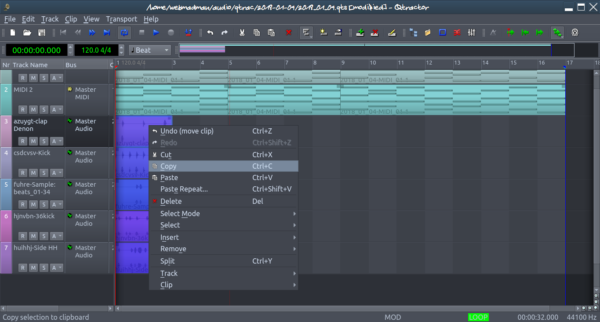
Then Paste Repeat-

7 more times to make 8 bars-

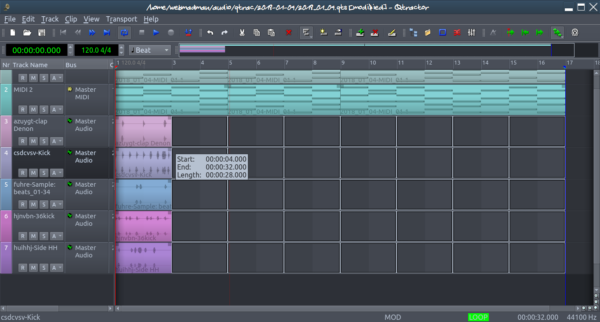
Eventually I get a fairly thick block-
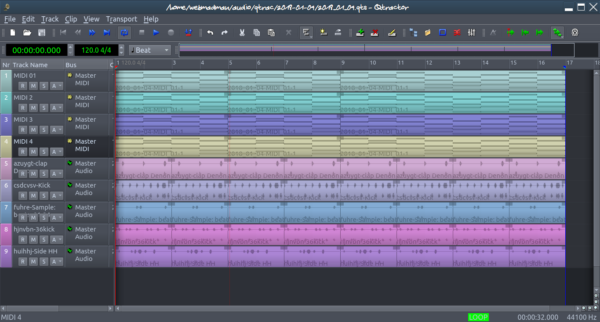
At this point I use mute and solo to listen tweak and edit until everything sounds good with everything.
I then copy that out a couple times-
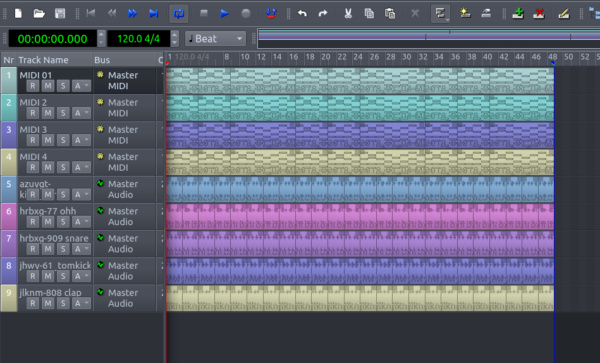
And start removing parts-
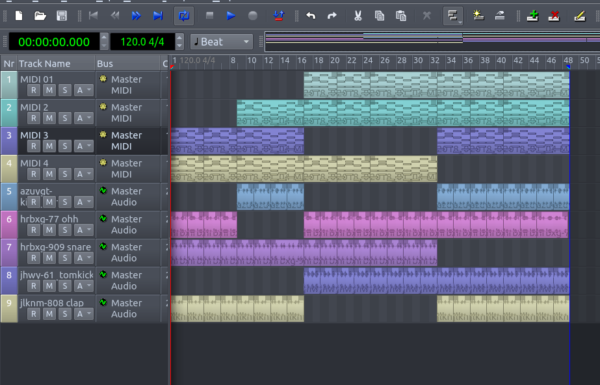
Once you have an arrangement you like, it’s time to render out an audio file.
There’s a couple of approaches to this. The quick and dirty way is to at this point do an audio export- Track > Export Tracks > Audio…
In the export dialogue, select the Master output and shift select the SynthOut output as well-

The result isn’t going to be ideal- QMA can do funky things using this method (there’s notes missing) and the sound mix is unpredictable.
A better approach is to record the synth tracks in real time into a track.
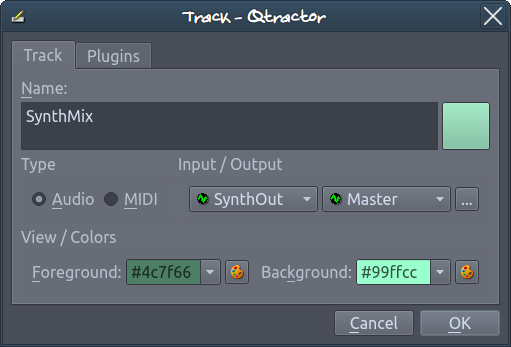
Create a new track, setting the Input to SynthOut-
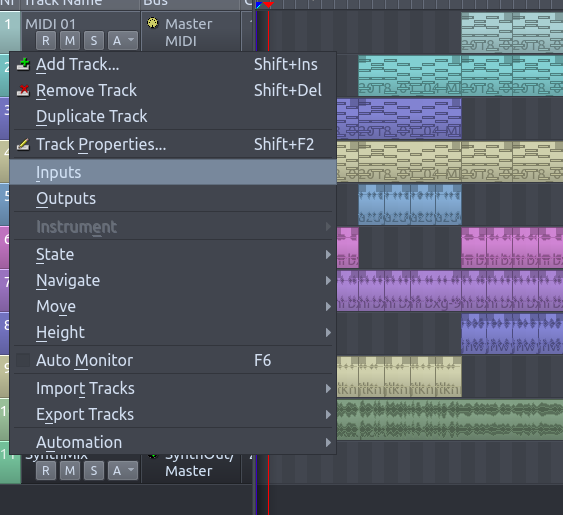
Right click on the colour label of the new track and select Inputs-
In the connections dialogue, Disconnect the capture inputs-
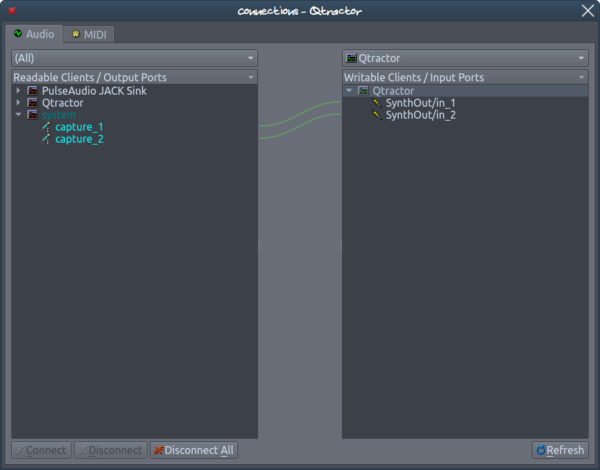
Then connect the SynthOut to the SynthOut-

Then turn off looping, arm the track (click the R so it turns red) and enable record- the red circle next to the play button-
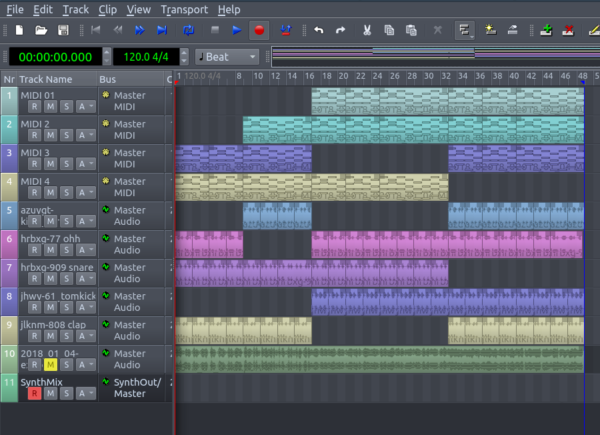
Then hit play to record-
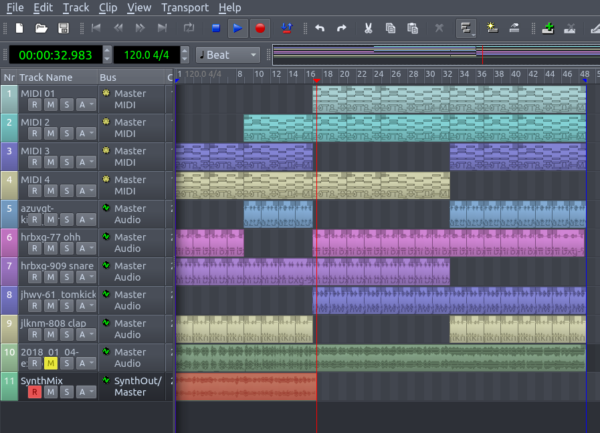
This will give you a more stable synth track to mix and properly master. Taking this further, you can render each synth track separately, giving even more control, but it takes more time- not an uncommon situation with these types of things.
So that’s the basic approach. While I am currently using Qtractor to work with, I originally started using this method in Ardour (http://ardour.org ). My album, Move Along (http://release.webmadman.net/MoveAlong2016/index.html ), was almost entirely done using this approach. I have put as many of the projects as I still have in this folder (I had a couple of hardrive failures in a short span of time and lost a bunch of stuff, so there’s gaps)-
http://sketchbin.webmadman.net/Ardour/
The problem I ran into with Ardour is that the GUI for the QMidiArp plugin no longer works in Ardour, and it doesn’t look like it will get fixed any time soon. I had tried out Qtractor a while ago, but Ardour was working for me, so I stuck with what was working.
Things weren’t exactly working with Qtractor and QMidiArp, but I was able to communicate with the developers and get my workflow back-
http://www.rncbc.org/drupal/node/1823
https://sourceforge.net/p/qmidiarp/bugs/20/
Yay!
So, if you want to play along at home, you might have to compile Qtractor and QMidiArp from the latest source to get it working smoothly, at least until the updated versions get out to the repositories.
The commands I use to pull the latest version and compile are as follows-
For Qtractor, check out this for dependencies- https://qtractor.sourceforge.io/doc/Manual%20-%202%20Installing%20and%20Configuring%20Qtractor.html
For the actual compile I use a slightly different set of commands-
git clone http://git.code.sf.net/p/qtractor/code qtractor-git

cd qtractor-git

./autogen.sh

./configure

make

sudo make install
For QMidiArp, the main dependencies are
https://github.com/emuse/qmidiarp
Accept it needs Qt5 now. The set of commands I run to compile and install are-
git clone https://git.code.sf.net/p/qmidiarp/code qmidiarp-code

cd qmidiarp-code/

autoreconf -i

./configure

make

sudo make install
It’s messy, but given time, the updates with bug fixes will be in the KXStudio repository.

